
Start the job
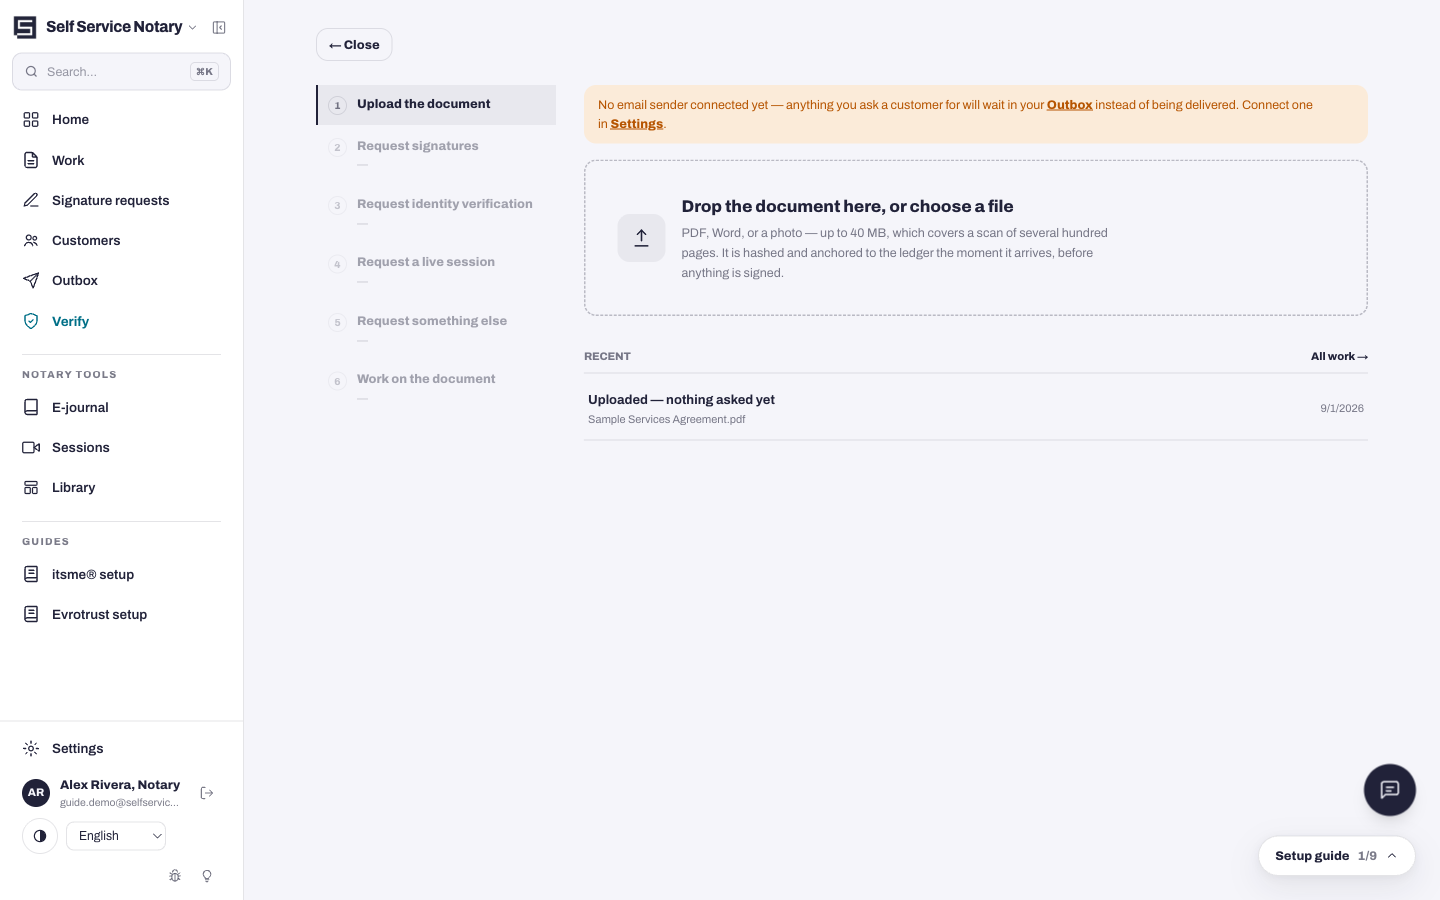
Open Work and press Start a new certification, or go to the wizard directly. Drop a PDF, a Word file or a photo into the upload area — up to 40 MB, which covers a scan of several hundred pages.
- Drag the file in, or press the drop area and choose it.
- The document is hashed and anchored to the ledger the moment it arrives — before anything is signed. You will see the ✓ next to it.
- Press Continue.
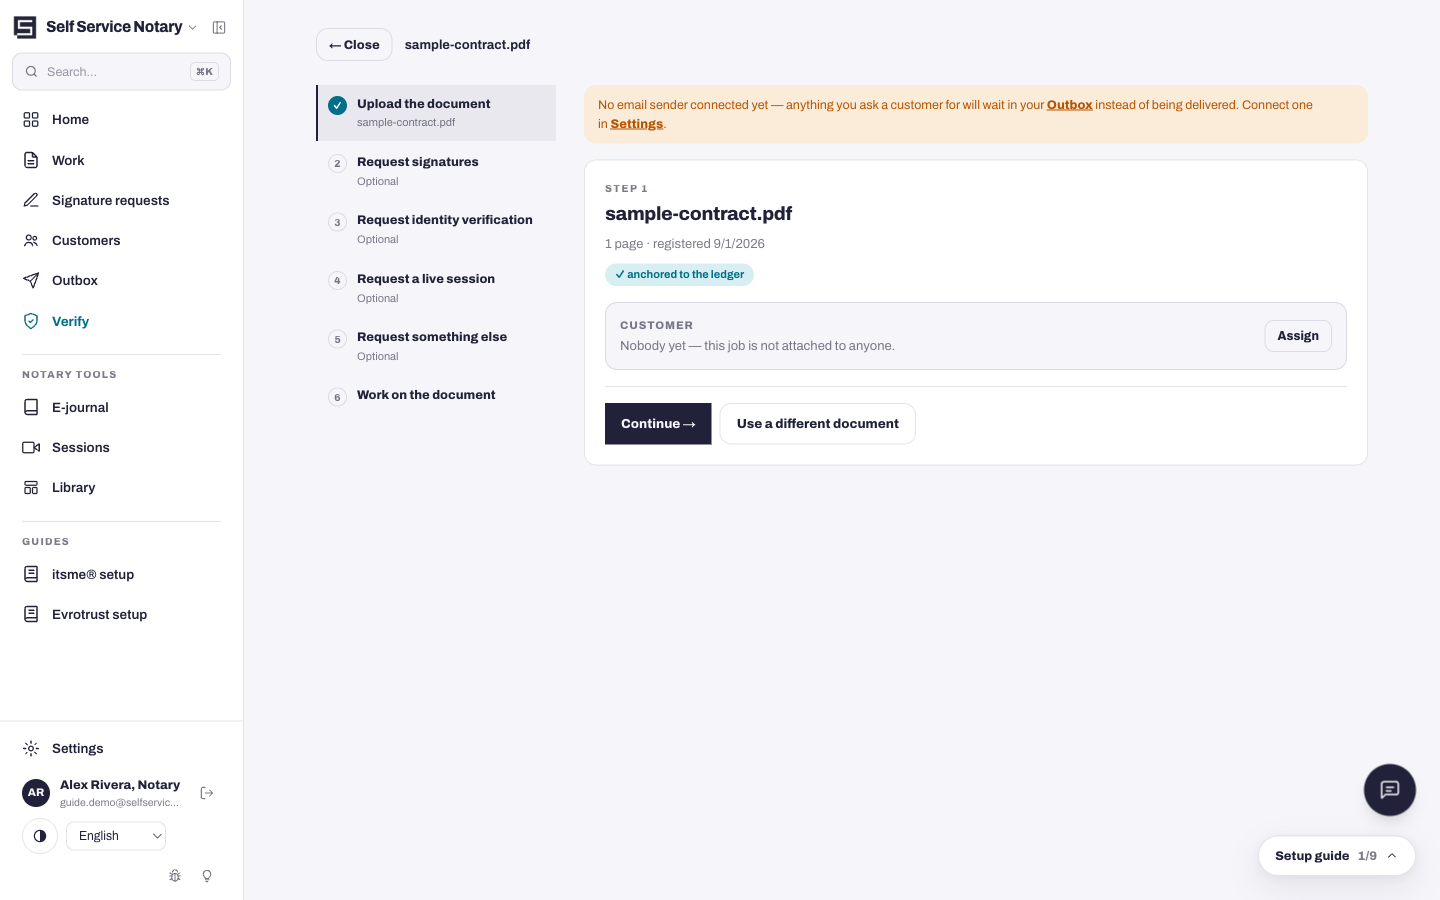
The six steps of the wizard
The left rail shows the whole job. Only the first and last steps are required — everything in between is optional and can be skipped.
- Upload the document — required, and already done.
- Request signatures — optional: ask people to sign electronically before you work on it.
- Request identity verification — filled in automatically when your signature request already includes it.
- Request a live session — optional video call (available when live sessions are switched on for the platform).
- Request something else — optional: ask in your own words for extra evidence, like a second ID or a proof of address.
- Work on the document — the seal editor, the last step.
Ask for signatures on the way (optional)
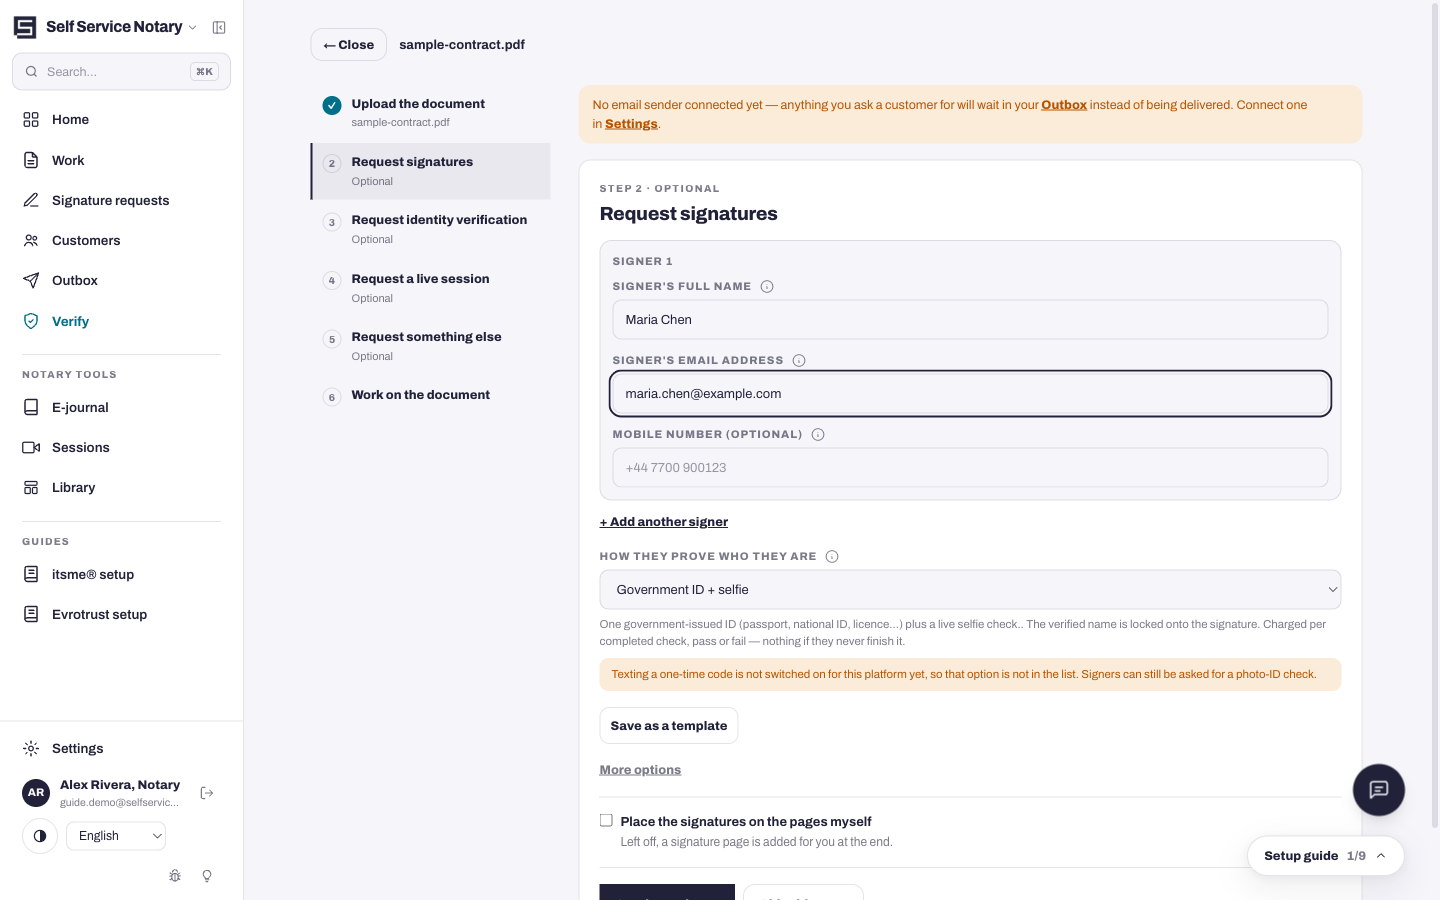
On step 2, press Add a signer. Each signer gets their own link; you seal the document yourself once they are done.
- Enter the signer's full name and email address.
- Choose how they prove who they are: Email link only, Government ID + selfie (the default), or Two different IDs + selfie.
- Leave Place the signatures on the pages myself off and a signature page is added for you at the end; tick it to place signature boxes yourself in the editor.
- Press Send to 1 signer. The rail now shows the count, like “0 of 1 signed”.
No email sender connected yet?
Until an email sender is connected in Settings → Email, requests wait in your Outbox instead of being delivered — nothing is lost, connect the sender and they go out.
The seal editor — the last step
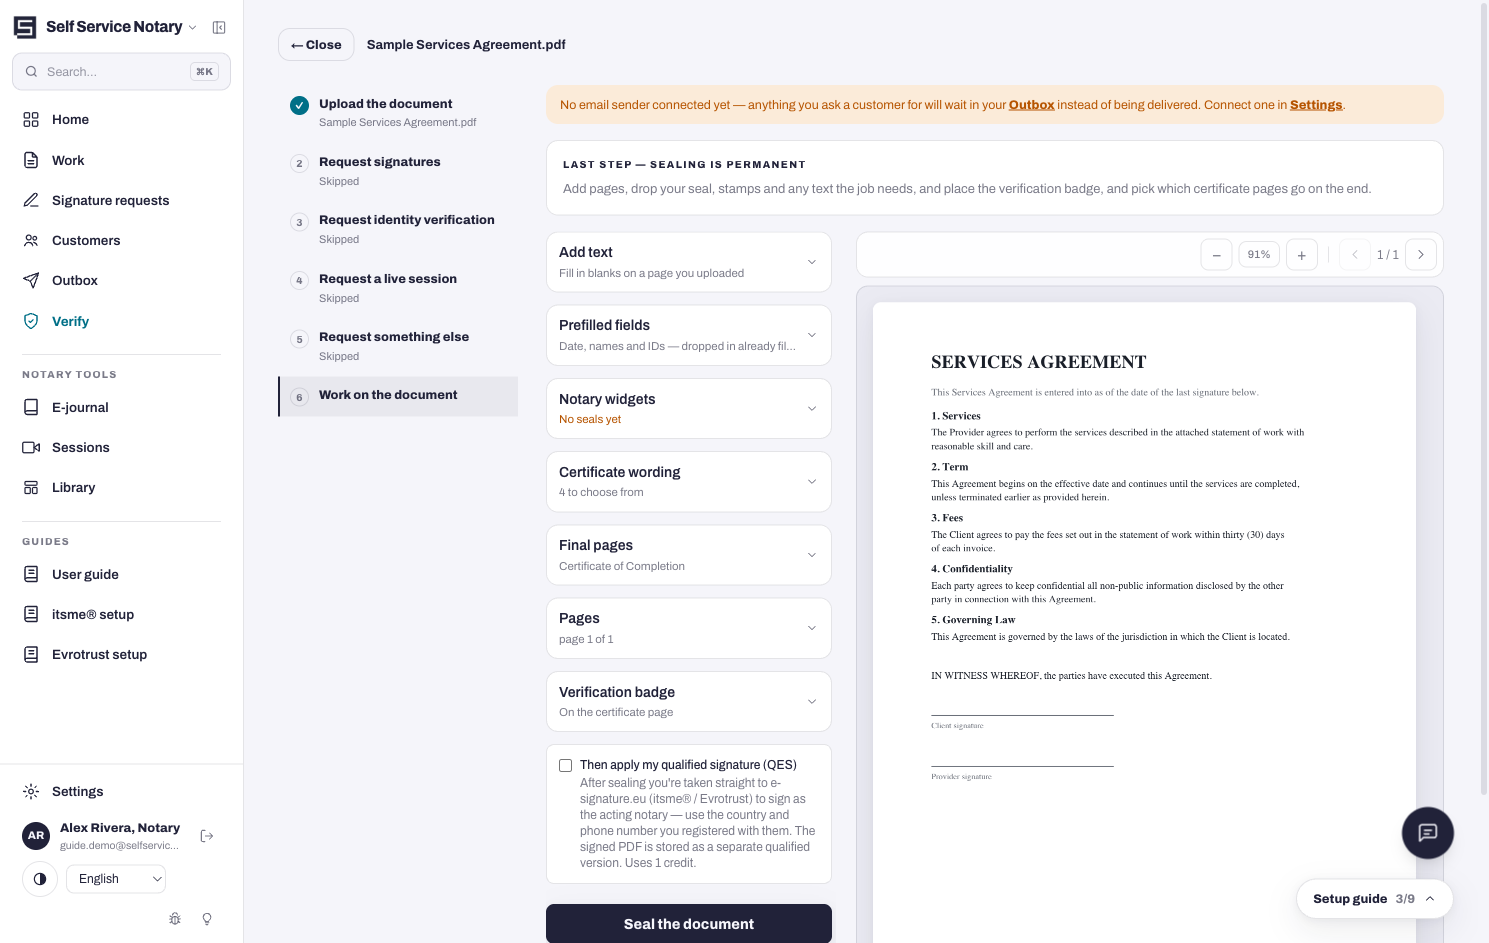
The editor shows the document with a tools column beside it. Everything you add here is stamped into the sealed PDF.
- Add text — fill in blanks on any page, with prefilled fields like today's date or the year ready to drop in.
- Notary widgets — your seal and signature images. Upload them once in Settings and they appear here.
- Certificate wording — pick the wording of the notarial certificate; four variants are offered.
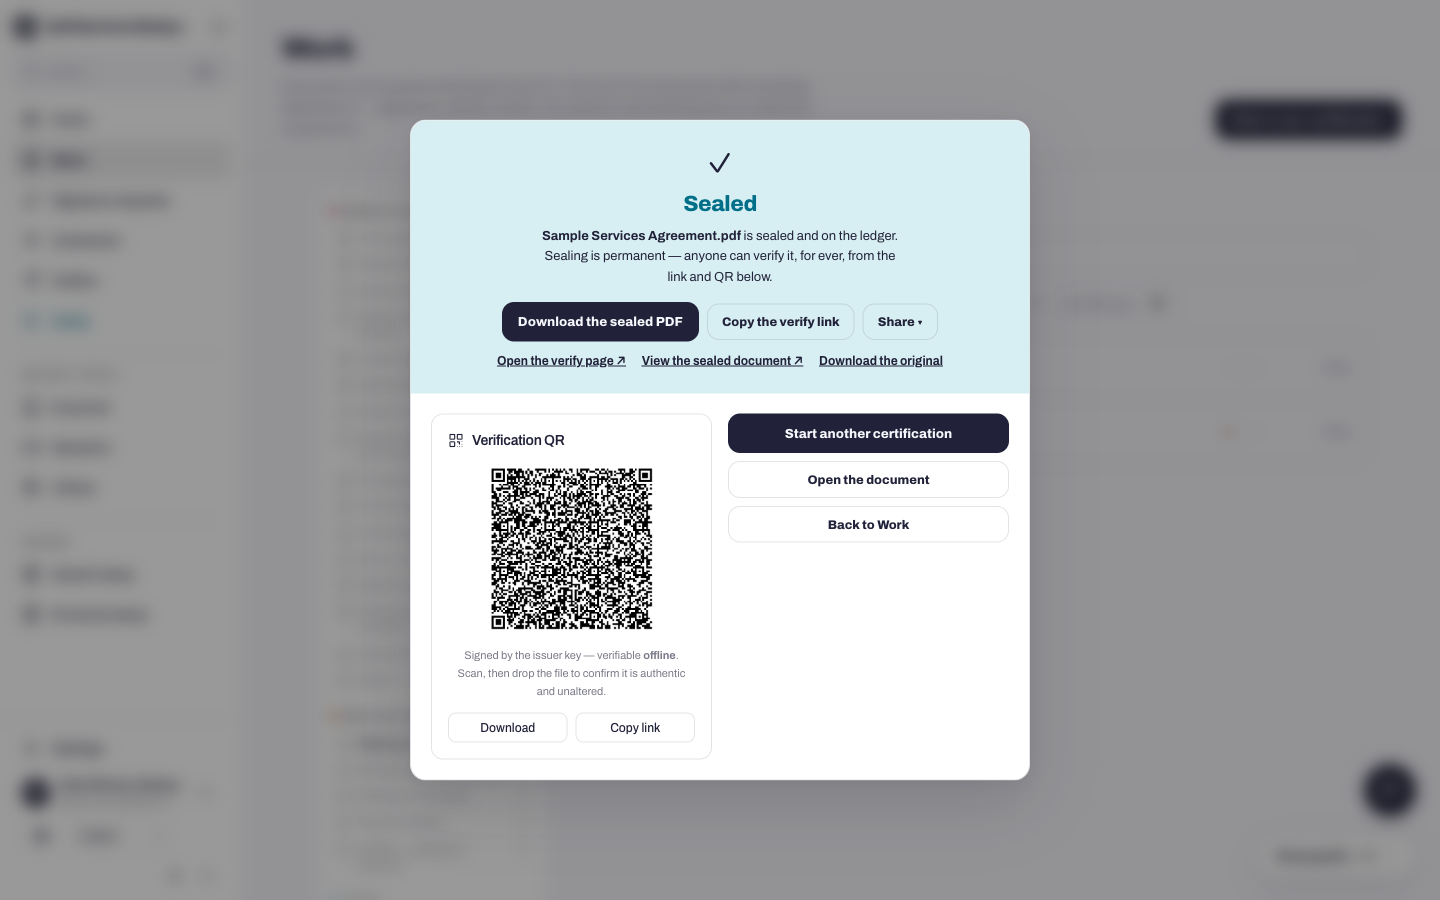
- Verification badge — the QR code that anyone can later scan to verify the document.
- Final pages — choose which certificate pages are appended, such as the Certificate of Completion.
- Then apply my qualified signature (QES) — tick this to be taken straight from sealing to your qualified signature.
Seal it
Press Seal the document. A confirmation dialog recites exactly what will be stamped — how many widgets, which final pages, the badge — because sealing is permanent.
- Read the confirmation: it names every final page and the badge placement.
- Press OK. The sealed PDF is written, the act is recorded in your e-journal, and you land back on Work with the finished document.
Sealing is permanent — by design
The sealed file can never be edited afterwards; that immutability is what the ledger vouches for. Need a change? Upload a new document and seal that.