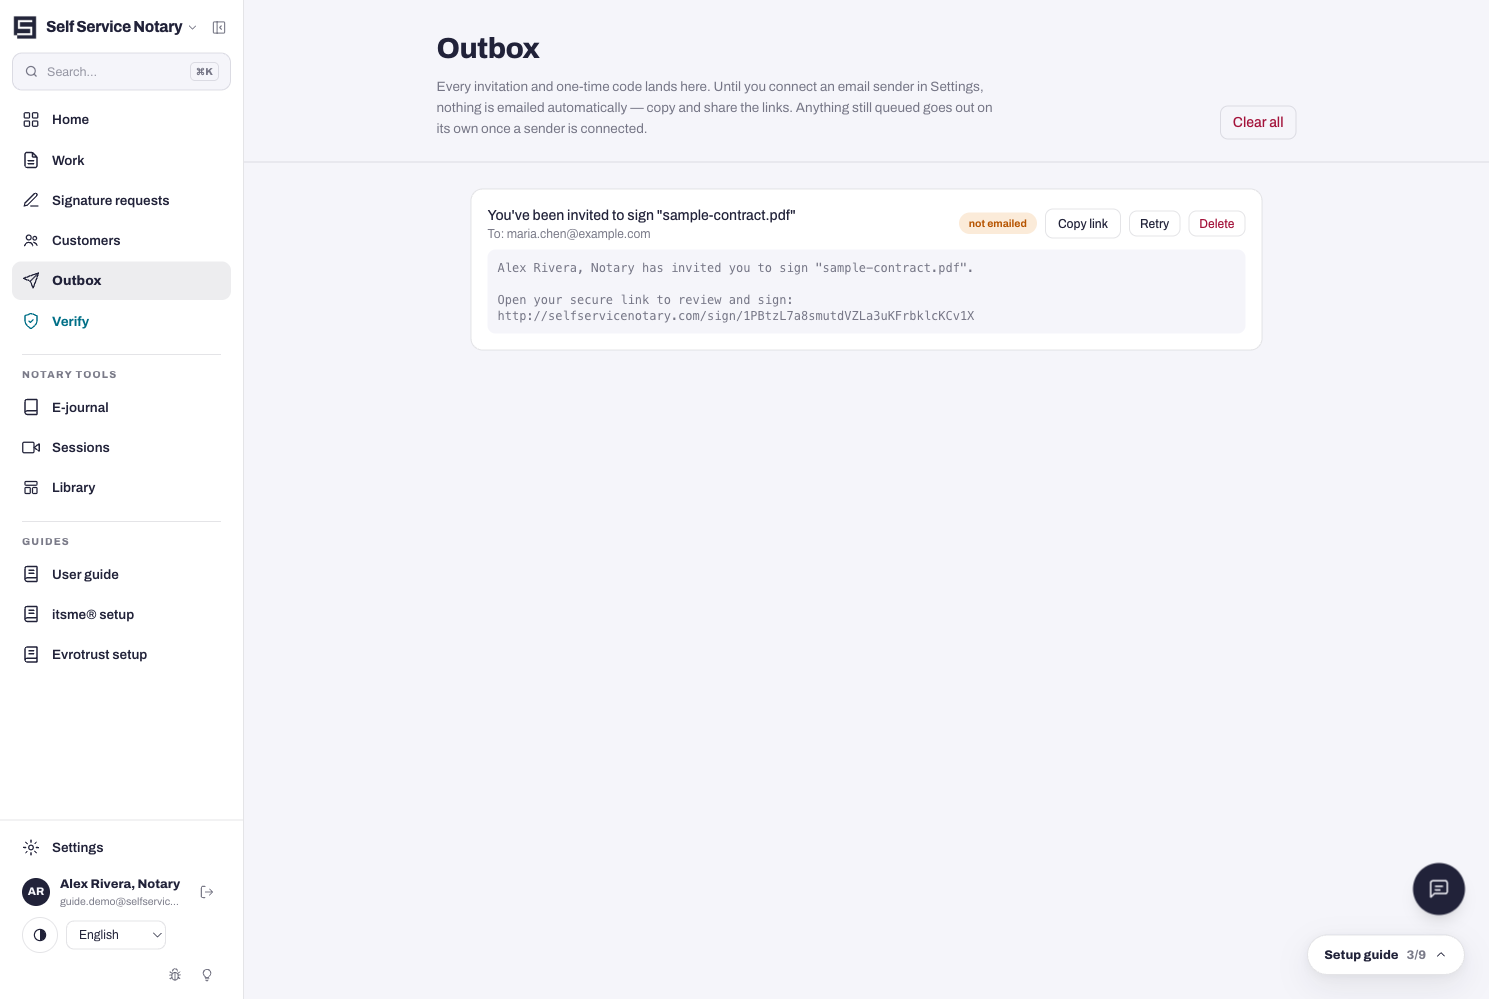
Email delivery
Settings → Email. Invitations and notices are sent from your own domain only. Until a sender is connected, everything stays in your Outbox, where you can copy the signing links and deliver them yourself.
- Outbox only — the default. Nothing is emailed; every message waits in the Outbox with its links ready to copy.
- Your own Resend account (API key + your domain) — the real sender, set up below.
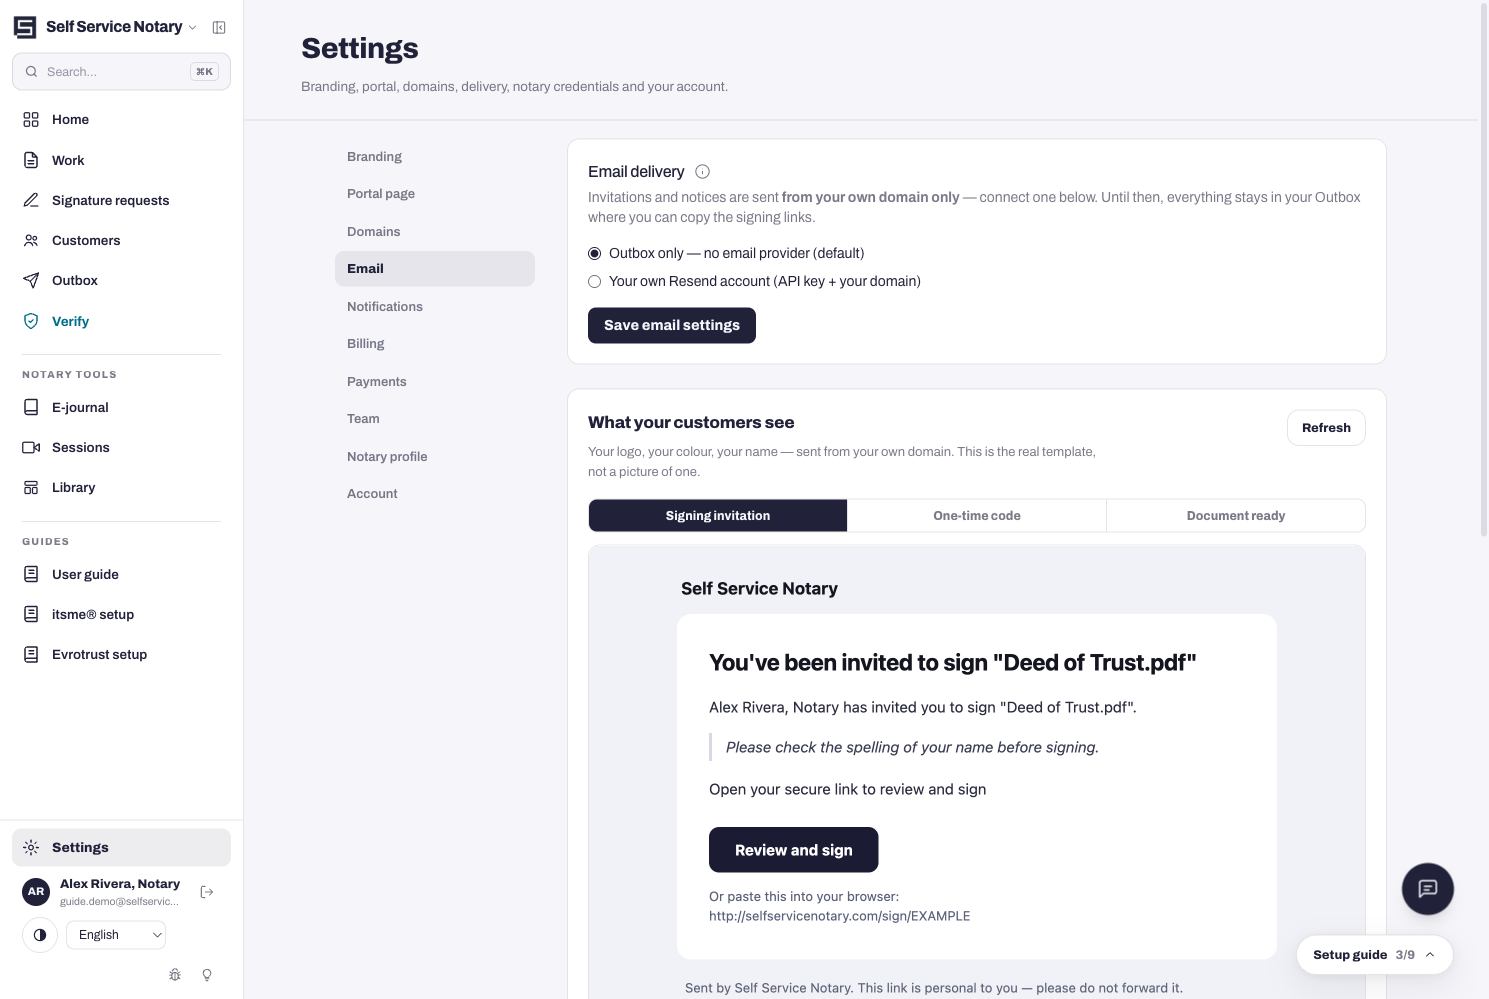
Connecting Resend, in four steps
Press How to connect your email sender on the card and follow along:
- Create a free Resend account at resend.com — the free tier covers a few thousand messages a month.
- Verify your domain there: Resend → Domains → Add domain, enter the domain your email address is on, add the DNS records Resend shows at your registrar, press Verify. This is what stops your mail landing in spam.
- Create an API key (Resend → API Keys → Create), choose Your own Resend account above, paste the key, and set a From address on the verified domain — notify@yourfirm.com, for example. A key that does not work is refused when you save, not silently later.
- Save email settings. From then on every invitation and notice leaves from your address.
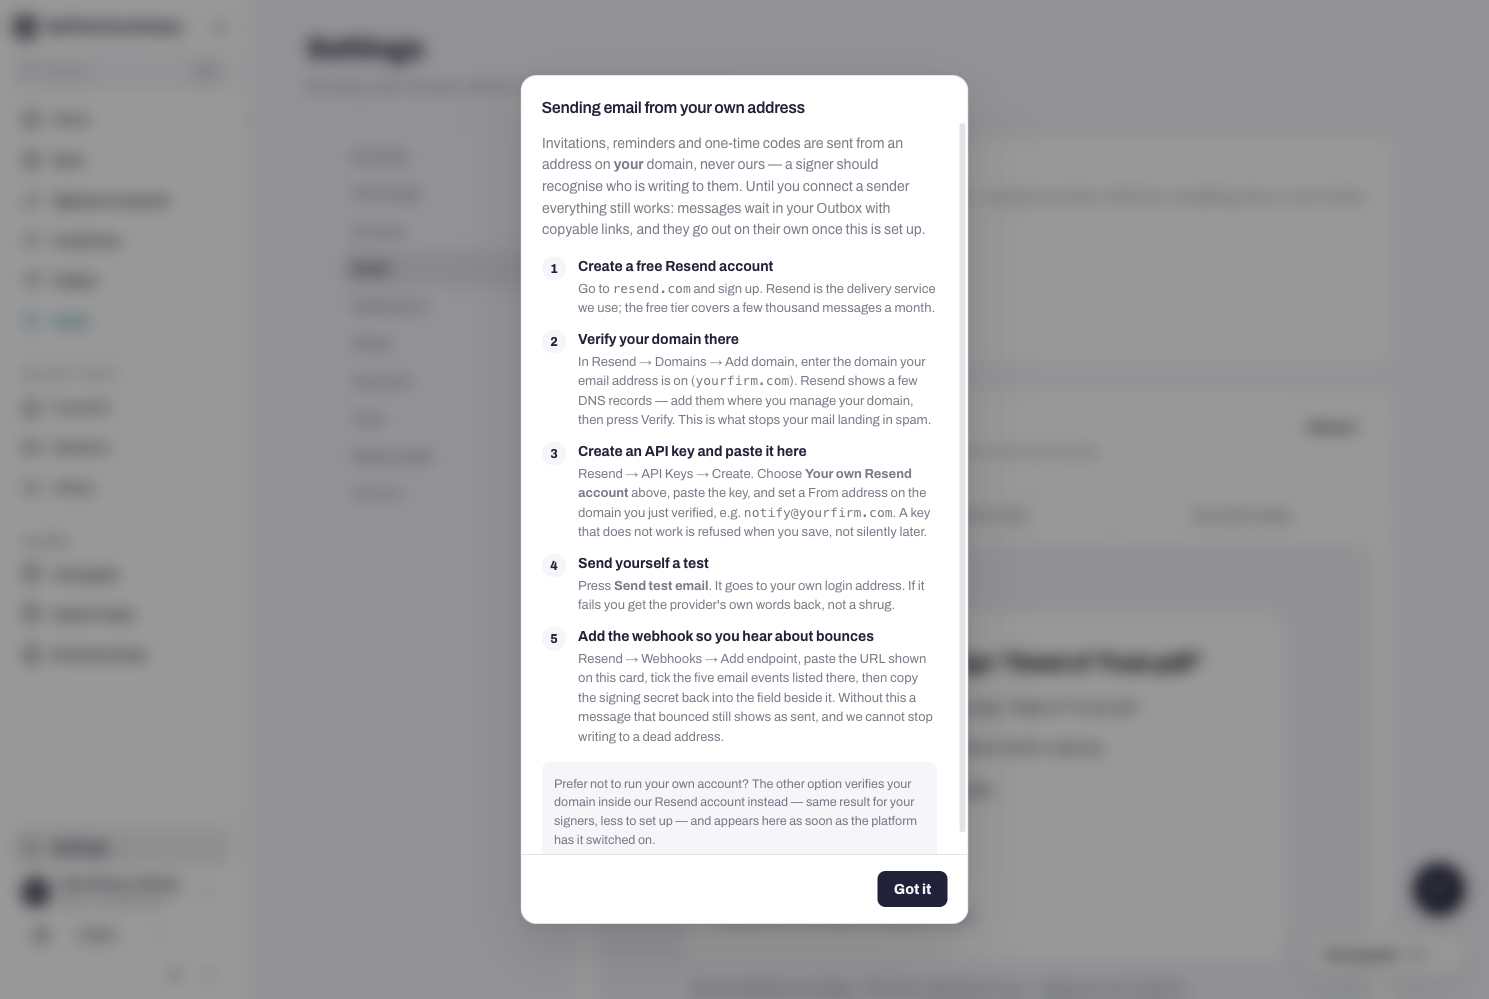
The Outbox
The Outbox in the sidebar holds everything waiting to be delivered — signature requests, notices, invitations. Each message shows its recipient and its links; copy a signing link and send it by any channel you like.